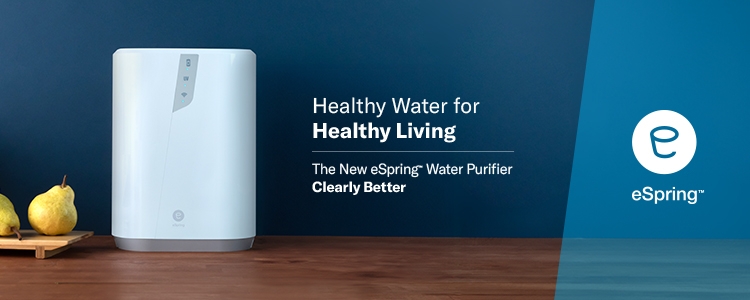
Beeeeep! Beeeeep! Beeeeep! That could be the sound of your eSpring Water Purifier telling you that it’s time to replace the eSpring e3 Carbon Filter.
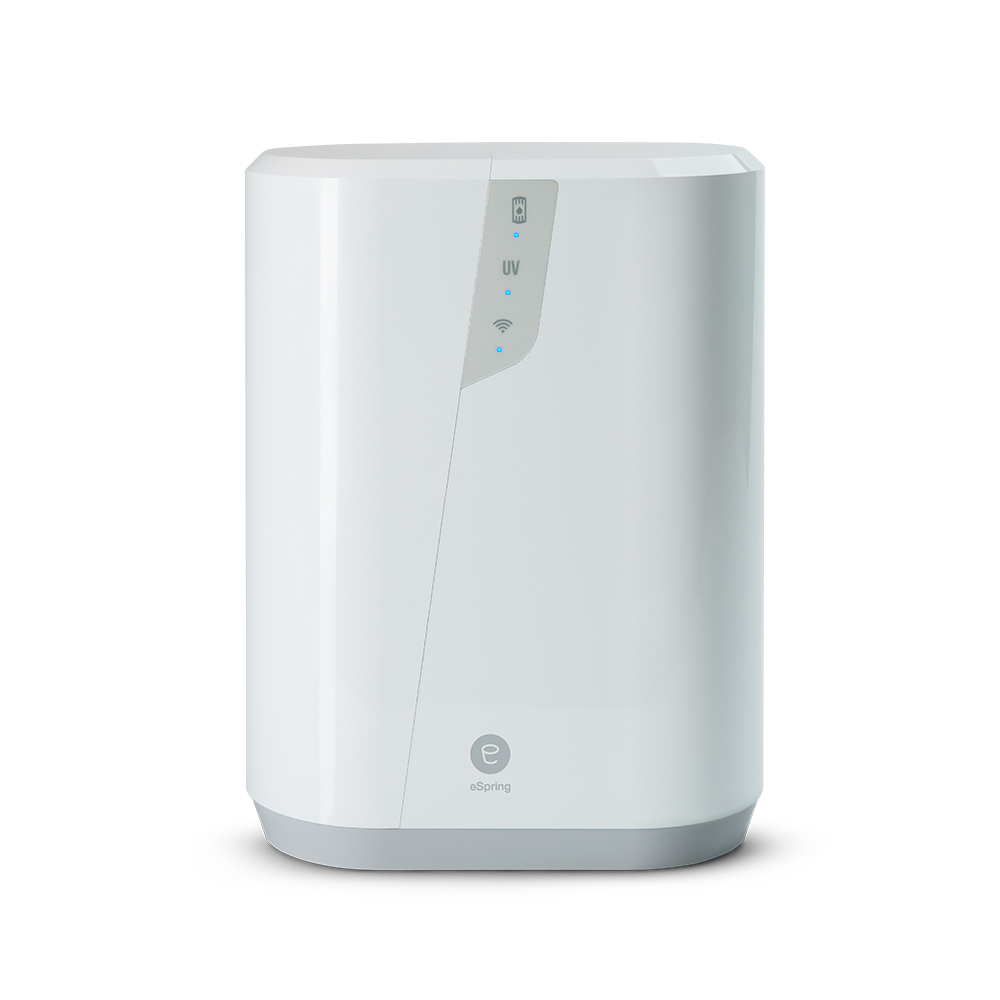
Besides listening out for beeps, you may also refer to the light indicator on your eSpring unit:

Beep at the start of the water flow
Slow beeping throughout the water flow
It’s advisable to replace the eSpring e3 Carbon Filter every year or once every 5,000 litres of water, whichever comes first, to maintain your water quality. If your water contains higher amounts of contaminants, you might be required to replace your eSpring e3 Carbon Filter more frequently.
What’s great is that you don’t have to keep track of the months or count how many litres of water you’re drinking each day to know when to replace the eSpring e3 Carbon Filter. Each eSpring Water Purifier features a display that shows the remaining carbon filter life and automatically informs when to replace the carbon filter.
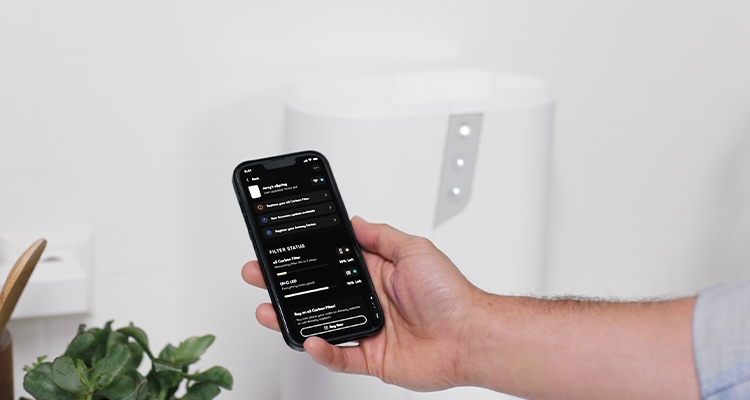
Both your unit and the Amway Healthy Home app will let you know when it’s time to change the filter on your eSpring Water Purifier.
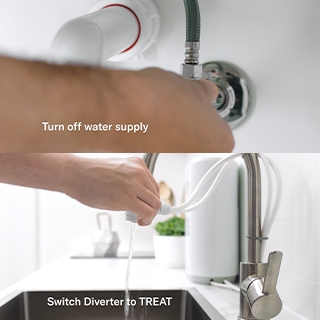
Turn off the water supply. Open the tap and switch to the TREAT position to drain the water from the unit.
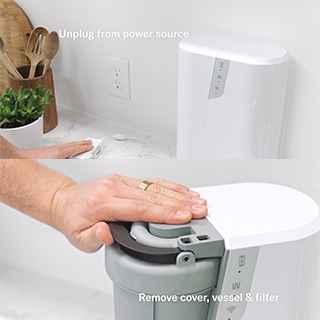
Unplug your eSpring from its power source. Take off the cover. Remove the filter vessel by lifting up the handle and lifting it out of the unit.
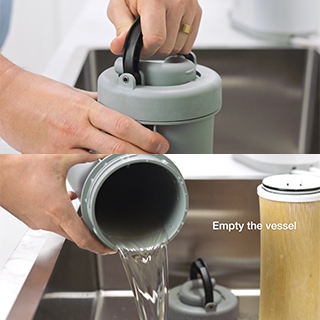
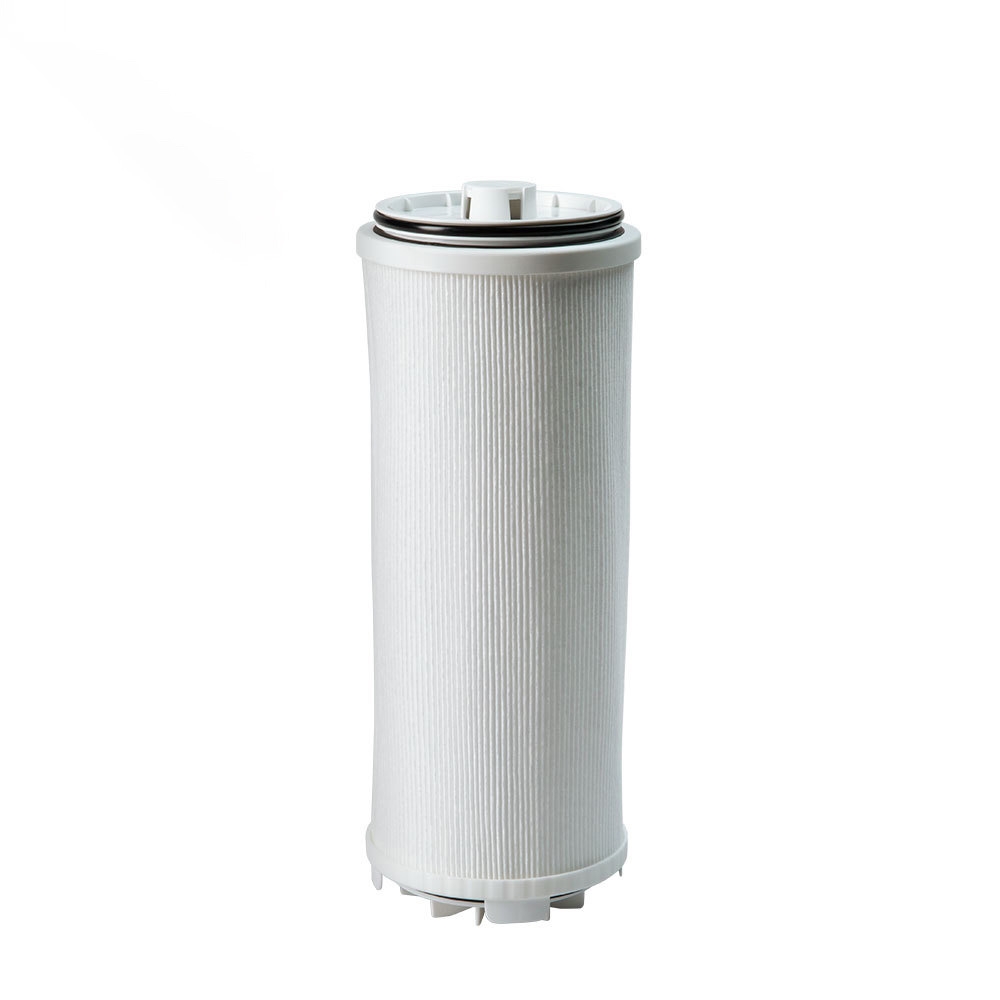
Take the vessel to the sink and open the lid. Remove the used filter and empty the vessel. Dispose of the used filter.
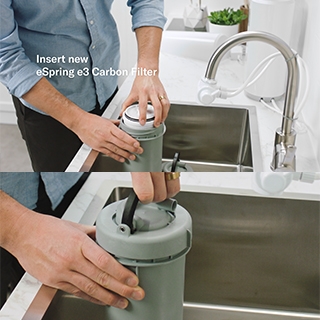
Place the new eSpring e3 Carbon Filter inside the vessel. Replace the lid on the vessel so that the ribs line up on the base of the vessel and the lid.
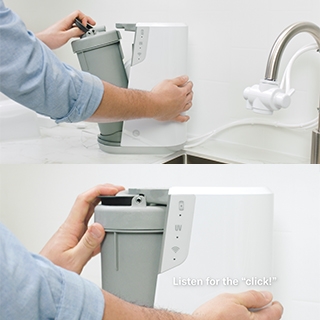
With the handle upright, tip the vessel into position in the unit. Latch the handle down until it clicks in place.
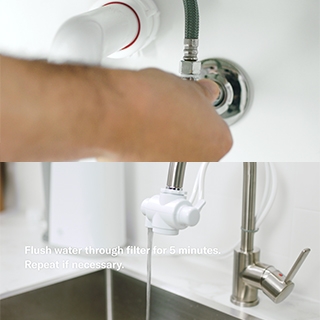
Turn on the water supply and open the kitchen tap. Keep the diverter in TREAT position. Let the water saturate the filter and then flow for a minimum of 5 minutes. If the water is not running clear after 5 minutes, continue running the water for another 5 minutes. While the water is running and with the cover still off, check for leaks. When the water runs clear, turn off the diverter and kitchen tap.
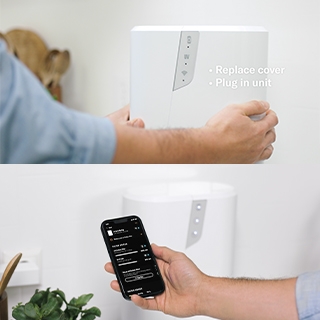
Replace the cover and plug the unit back in. Check for the blue filter light on the unit and that the Amway Healthy Home app now shows 100% carbon filter life. Your eSpring Water Purifier is now ready to use.